Overview
Django Tags Input is a module that gives you a modified version of the Xoxco jQuery Tags Input library within Django.
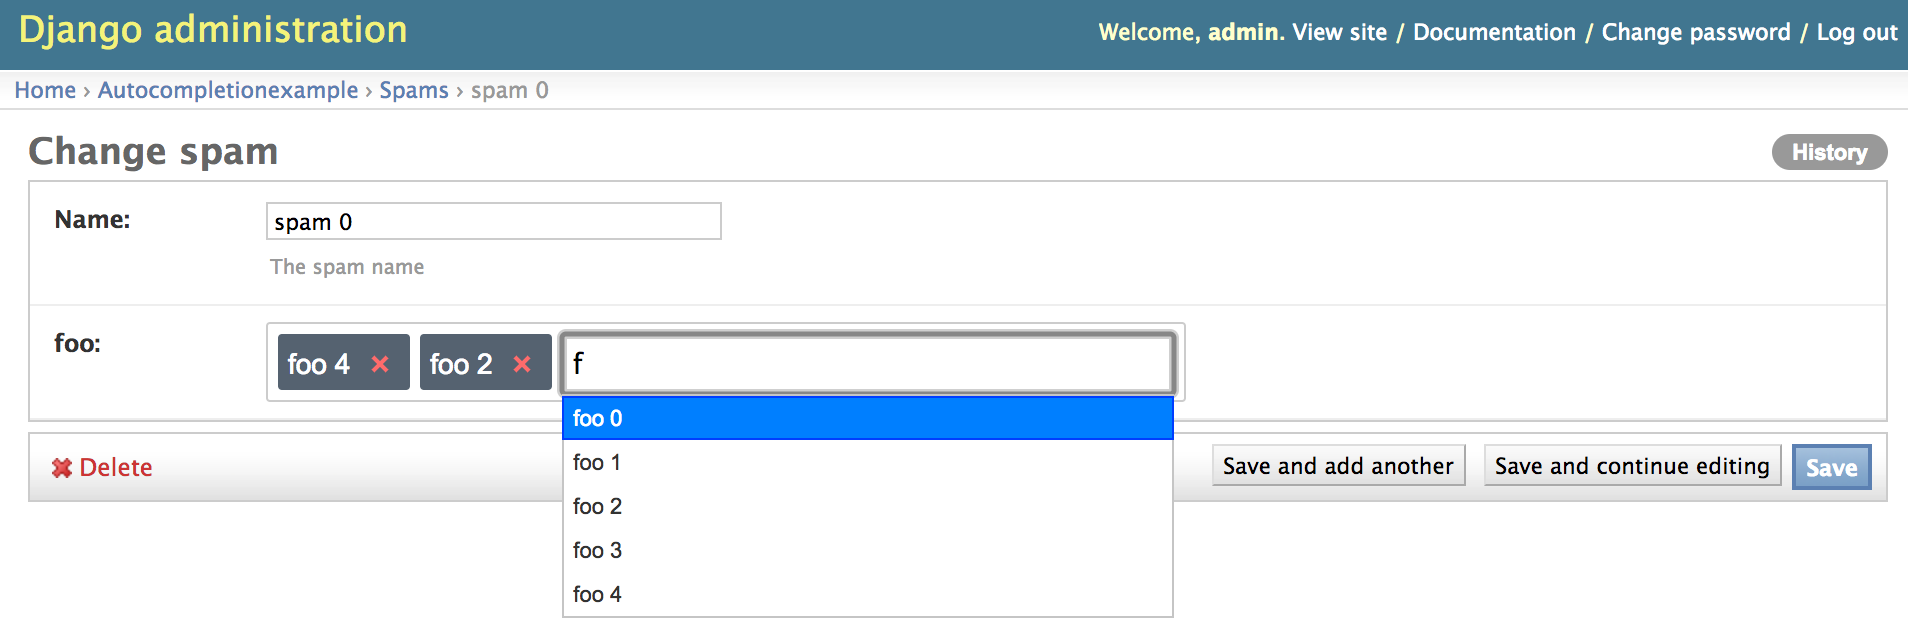
The result is a very pretty interface with tags and autocomplete which can optionally automatically create new items when they are missing.
One of the most useful features of Django Tags Input is that it stores the elements in the order which you input.
So if you insert B, A, C into the database, it will return it sorted the way you entered it: B, A, C.
Links
The source: https://github.com/WoLpH/django-tags-input
Project page: https://pypi.python.org/pypi/django-tags-input
Reporting bugs: https://github.com/WoLpH/django-tags-input/issues
Documentation: http://django-tags-input.readthedocs.org/en/latest/
My blog: http://w.wol.ph/
How to install
Installing this module only takes a couple of minutes.
Currently Django 2.2, 3.1 and 3.2 are supported and tested in combination with Python 3.7, 3.8, 3.9 and 3.10.
For Django below 2.2 and Python 2.7 up to version 4.6.0 should work.
For Django 1.4, Django 1.5, Django 1.6 and Django 1.7 in combination with Python 2.6 and 2.7. Python 3.2, 3.3 and 3.4. Pypy and Pypy3 version 2.1.0 can be used.
Install the module itself
pip install django-tags-input
# or
easy_install django-tags-input
Add
tags_inputto yourINSTALLED_APPSsetting in the Djangosettings.py.Example:
INSTALLED_APPS = (
    # ... your other installed apps
    'tags_input',
)
Add the mappings to your
settings.pyfile:Example:
TAGS_INPUT_MAPPINGS = {
    'some_app.SomeKeyword': {
        'field': 'some_field',
    },
    'some_app.SomeOtherKeyword': {
        'fields': ('some_field', 'some_other_field'),
    },
    'some_app.SomeSortedKeyword': {
        'field': 'some_field',
        'ordering': [
            'some_field',
            'some_other_field',
        ],
        'filters': {
            'some_field__istartswith': 'a',
        },
        'excludes': {
            'some_field__iexact': 'foobar',
        },
    },
    'some_app.SomeCreateableKeyword': {
        'field': 'some_field',
        'create_missing': True,
    },
}
Add the
tags_inputurls to yoururls.py:Example:
from django.conf import urls

urlpatterns = patterns('',
    url(r'^tags_input/', include('tags_input.urls', namespace='tags_input')),
    # ... other urls ...
)
Admin usage
from django.contrib import admin
import models
from tags_input import admin as tags_input_admin

class YourAdmin(tags_input_admin.TagsInputAdmin):

    #Optionally specify which ManyToMany fields are to be used for tagging
    #Or define a get_tag_fields() method
    tag_fields = ["some_field"]

admin.site.register(models.YourModel, YourAdmin)
Quickstart
To test the project simply clone the repository, install and run the example:
# mkvirtualenv is part of virtualenvwrapper, using a regular virtualenv, pyvenv or pipenv is also possible
# Or even without any type of virtualenv at all
mkvirtualenv django-tags-input
git clone https://github.com/WoLpH/django-tags-input.git
# Tested with Django 3.0
pip install django
pip install -e 'django-tags-input[tests]'
cd django-tags-input/example
python manage.py runserver
Now you can go to http://localhost:8000/admin/ and login with username and password admin and admin respectively.
After this you can try adding some extra Foo objects through the Spam admin here: http://localhost:8000/admin/autocompletionexample/spam/2/
Note that some parts of the example are deliberately broken to test the behaviour in broken environments.